How to Winterize Your RV
Project
Room
Cost
Skill Level
At the end of the RVing season and before you put your trailer or motorhome into storage for the winter, you should winterize your RV. For those who might be doing this for the first time, we tell you everything you need to know about winterizing.
Here’s what it means to winterize your RV, who should winterize their RV (do you really need to?), when this process needs to be done, and how to do it.
What is Winterizing?
Winterizing your RV simply means preparing the internal systems to withstand below-freezing temperatures. This process involves removing water from:
- Water lines
- Holding tanks (grey and black)
- The water heater
- And any other water systems your RV might have
Even if there is a little bit of water left in the system, the freezing temperatures can cause the system to freeze, expand, and damage your RV. Remember that water expands when it freezes.
Methods for winterizing your camper
There are two common ways to winterize your RV. One method involves adding RV anti-freeze and the other involves blowing out the lines with an air compressor. Regardless of the method, the end goal is the same: to get the water out of your RV’s water lines.
When Should You Winterize Your RV?
There are three scenarios for when you should winterize your camper:
- Temperatures are going below freezing
- You’re traveling through an area with a cold climate
- When you put your RV in storage
When temperatures go below freezing
If the area temperature is going to dip below freezing for more than 24 hours, you should winterize your RV to prevent damage to the plumbing. Alternatively, you can pack up and drive somewhere warmer.
When you’re traveling through colder regions
Even if you’re headed south to warmer temperatures, keep an eye on the local temperatures. You might be tempted to stay in summer mode, but a sudden cold snap can wreck your plumbing and cost you time and money.
When you’re putting your RV in storage
Lastly, regardless of where you live and where your RV is going to be stored, you should winterize your camper.
Do You Have to Winterize Your RV?
Unless you live in your rig all year round in a location that never experiences freezing temperatures, then yes.
How to Winterize Your Camper
Now that we’ve established that basically everyone needs to winterize their camper at some point, let’s get into how. Below is a step-by-step guide to completing the winterizing basics on your own!
Shopping List
Tools
Instructions for Winterizing Your Camper
Step
Clean the entire interior. Make sure all trash is removed, vacuum up any/all food crumbs, and wipe down all surfaces.
Stove: Clean all food and crumbs from the stovetop and oven.
Fridge: Make sure the fridge is defrosted and wipe down the interior of any water and food. Then, prop the doors open while in storage to prevent any mold.
Step
Disconnect your RV. Disconnect the water source, turn off all power, and shut off your propane tanks.
Step
Bypass the water heater. Turn the water heater bypass valve to closed. Most RV’s already have a water heater bypass valve installed and you can locate this inside near the water heater.
If you do not have a bypass valve, it’s recommended to install one or you’ll need an additional 6 to 10 gallons of antifreeze.
Note: If you have a water filtration unit in your RV, be sure to bypass that as well.
Step
Drain/blow out the lines. Open all faucets in your entire RV and let the water drain out. Next, connect the blowout plug to the city water inlet and use a compressor at 30psi to force out all the remaining water from the lines. Once the lines are empty, close all the faucets
Step
Empty the black and grey tanks. Once the tanks are completely drained, make sure the valves are shut.
Step
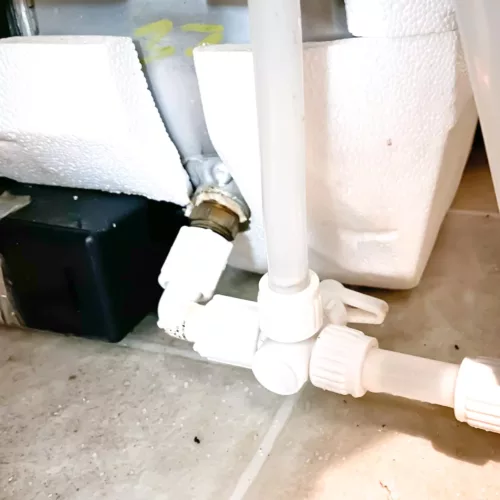
Empty the freshwater tank. There is a valve on the bottom of the freshwater tank. Just open it up and let the tank drain. Leave the value open till spring.
Note: If you open the valve and water does not flow out (if the tank has water), it could be clogged. Just take a hose and run water through the valve. It will clear the blockage.

Step
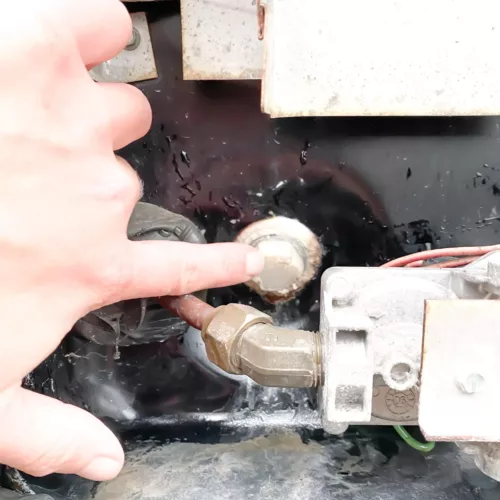
Drain the water heater. Before doing this, make sure the water heater and the water pump are turned off and the water is completely cool. Open up the water heater panel from the outside and remove the drain plug. Once all the water has drained, flush out any sediment using a water heater tank rinsing wand to remove any sediment. Leave the drain plug open until spring.
Note: If you don’t have a hot water bypass valve, then you’ll need to put the drain plug back in because the hot water heater will need to be filled with antifreeze.
Step
Fill the plumbing system with antifreeze. There are two ways to do this:
- With the water pump via a pump converter kit. This kit allows you to pump antifreeze through the lines quickly and easily via your water pump. Some RV’s already have them installed from the factory, but if your model is not equipped with one, you can install it for relatively cheap. See it here.
- With a hand pump.
If you have a water pump converter kit installed:
- Turn the valve to open and place the tube into a gallon of antifreeze.
- Turn on the water pump
- Go around to each faucet and turn on the hot water until you see the antifreeze come out. Once you see the antifreeze, close the faucet valve. Repeat this process for the cold water.
- Flush your toilet until antifreeze appears as well.
If you have a hand pump:
- Connect the hand pump to the city water inlet per the instructions.
- Open the hot water of the highest faucet first (typically the kitchen sink). Pump antifreeze until you see it come out and close the faucet valve. Repeat this process for the cold water and all other faucets and toilets.
Now all the water lines are winterized!
Note: If you have an ice maker or washing machine, follow the manufacturer user manual for instructions on winterizing those items.
Step
Add antifreeze to each drain. Go around to each sink, shower, and toilet and pour about a 1/2 gallon of antifreeze down the drain. This will protect the sink traps and the black/grey tanks from freezing.
Step
Remove all food, drinks, and toiletries. When temperatures drop below freezing, liquid items can freeze and burst, so you just want to make sure they are all removed. Also, any food items can attract rodents.
Close all windows and vents. Go around your RV and make sure all the roof vents and windows are securely shut.
Step
Place mini dehumidifiers around your RV. Open the mini dehumidifier or moisture absorber and place it on a surface. It will remove dampness from the air and help prevent corrosion, mold, and mildew.
Step
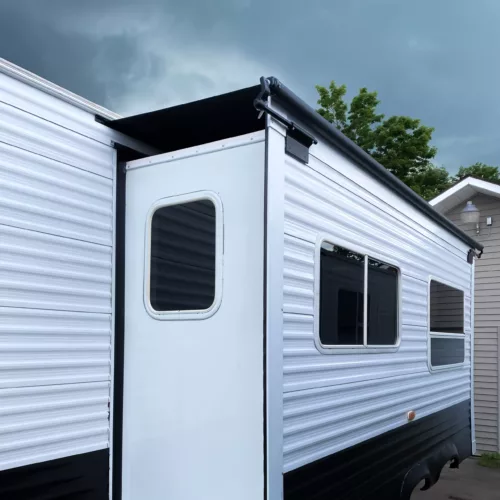
Inspect and clean the exterior. Go around the exterior and make sure all seals around the doors, windows, and corners look good. If they are cracked, you’ll need to reseal them. See the steps here. Go on the roof and inspect the lap sealant to make sure it’s not cracked as well. If you see cracks apply some more lap sealant to prevent roof water damage. Finally, wash the exterior of your RV.