How to Paint an RV Exterior
Project
Room
Cost
Skill Level
Is your vintage camper (or even your new camper) in need of a paint job? Give your RV a new lease on life with an exterior paint job. Follow these step-by-step instructions on how to paint your RV exterior.
Whether your RV is a pop-up camper, travel trailer, fifth-wheel, or motorhome, this guide will help you. Included is the prep work required before you start painting, how to remove the decals, and how to paint clean lines. Plus, we share top product recommendations so your camper comes out looking fresh.
Shopping List for Painting a Camper Exterior
- Dupli-Color Primer
- Dupli-Color Base Color Paint (this is what we recommend for your RV exterior paint)
- Dupli-Color Clear Coat
- FrogTape Painters Tape
- Masking Paper
- Acetone or Goof Off
- Scuff Pads
- Sanding Block
- Microfiber Cloth
Tools & Supplies
Instructions: How to Paint an RV
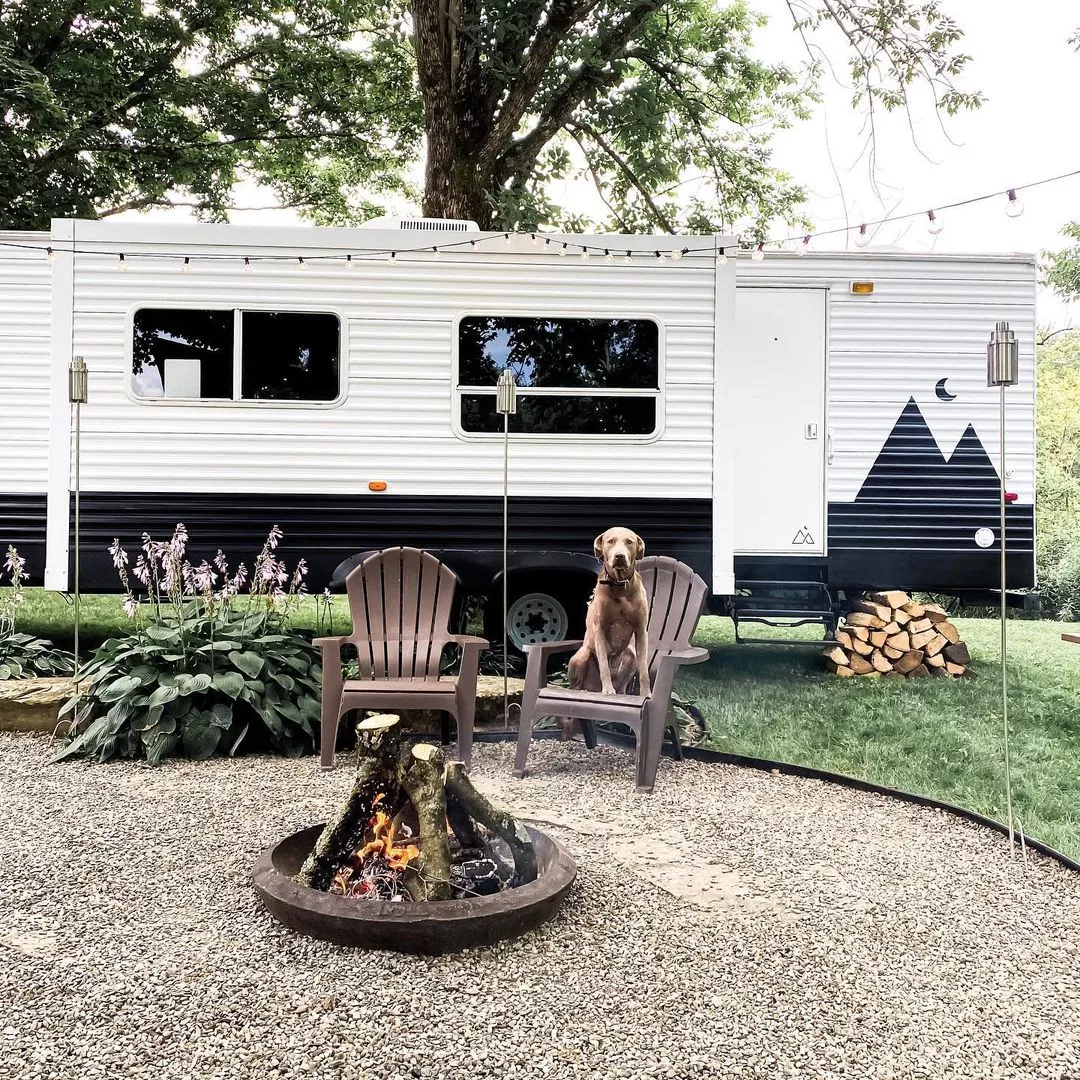
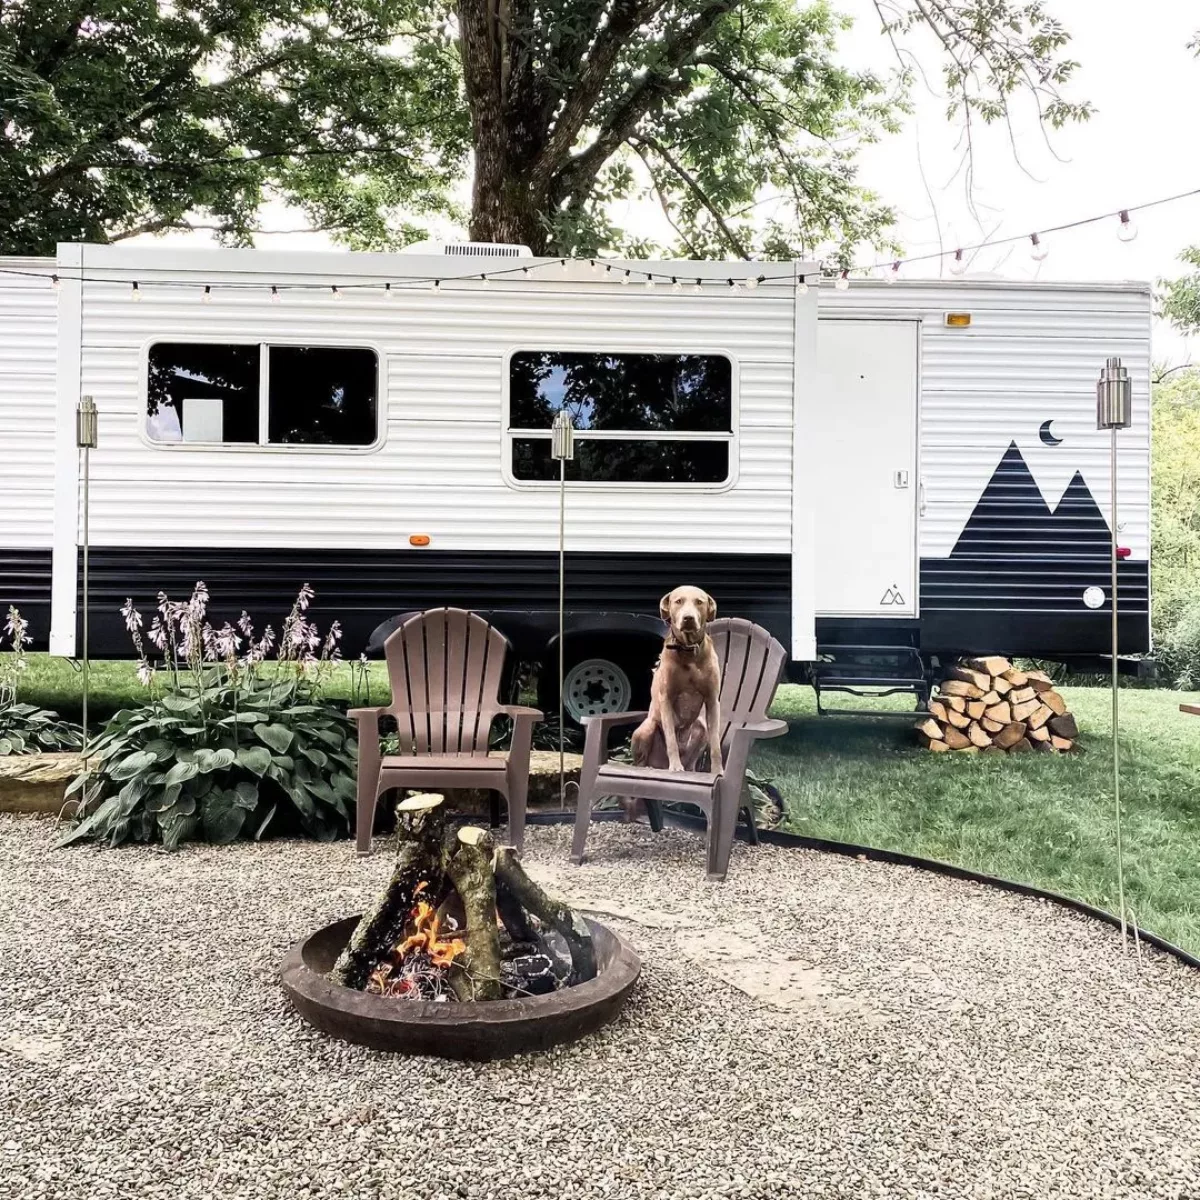
Over the years, we have successfully renovated two travel trailers top to bottom and including the exteriors. To give both rigs a fresh new look, this is the exterior painting technique that we recommend.
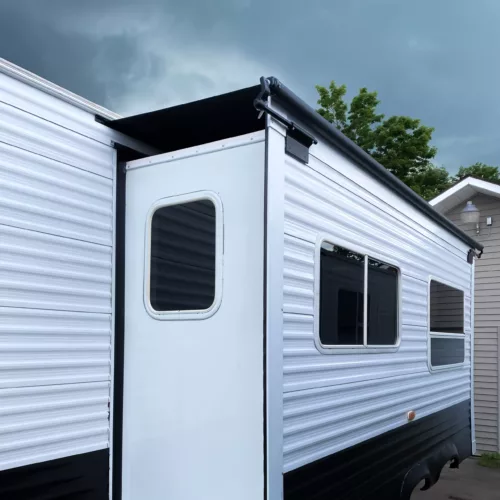
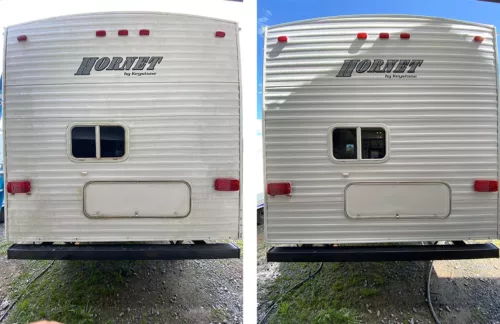
Want to check out both renovations? Here is the 2007 Keystone Hornet and the 2005 Keystone Hornet.
Here is how to paint your RV’s exterior.
Step
Wash your RV’s exterior
Wash your camper’s exterior to remove any dirt and road grime. Be sure to remove all decals from areas that you plan to paint. Never paint over decals. I recommend using a decal remover tool to remove any decals easily.
To remove RV decals:
- Use a heat gun to heat the decal so that you can pull off the vinyl by hand. The 3m decal remover tool will work wonders on those old sun baked decals.
- Remove any remaining decal residue with a cloth and Goof Off
Step
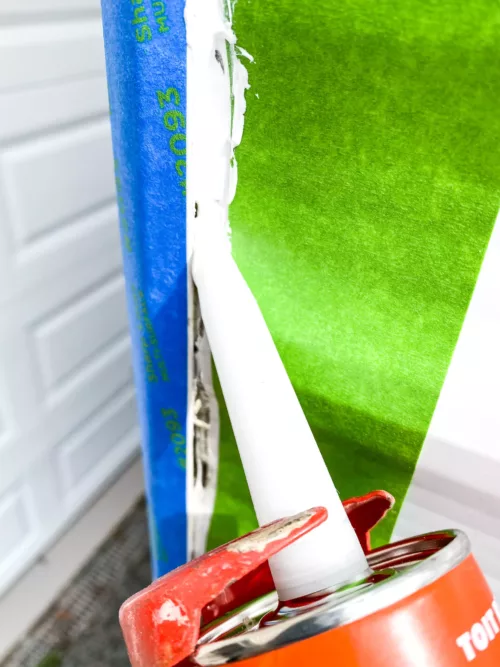
Caulk all the exterior joints
After cleaning the RV’s exterior, make sure all the exterior joints don’t have any gaps or cracks in the caulk.
If there are cracks in the caulking, it’s important to reseal your RV exterior before you start painting.
Step
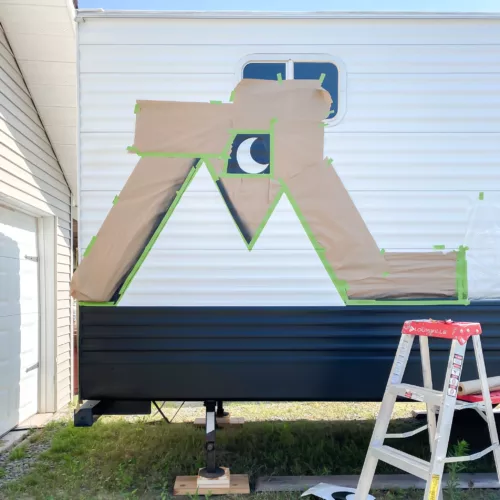
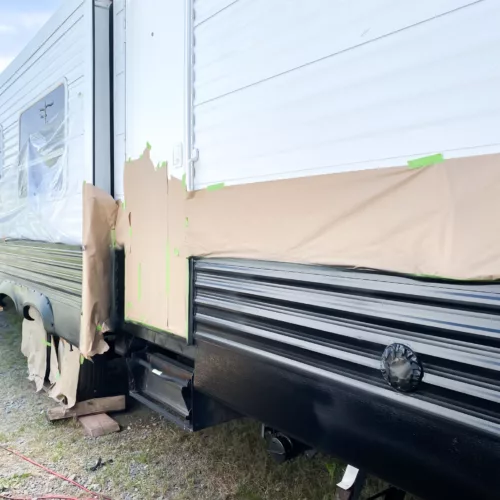
Tape or mask off any areas
Just like painting the RV’s interior walls or your house, tape or mask off any areas that you do not want to be painted.
Use the masking paper to block off larger areas from the overspray.
Step
Lightly sand
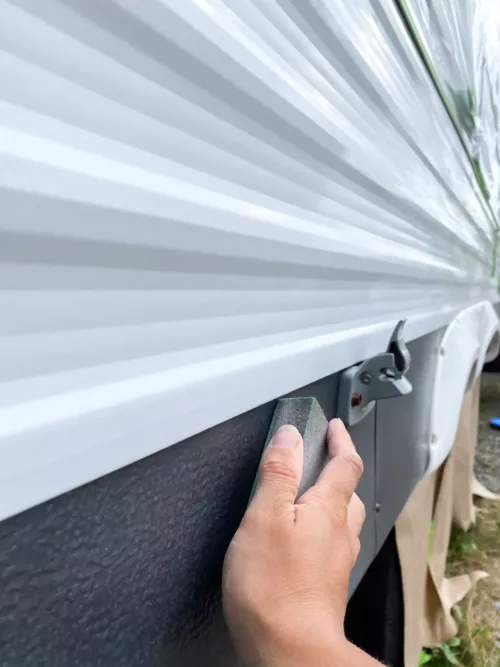
After you’ve taped off the areas you want to paint, sand down all areas of the camper that you plan to paint.
Use an 80 grit sanding block and lightly buff the exterior to create a smooth surface. The purpose of this step is to create a roughened surface so the paint has something to adhere to.
Step
Clean
Next, wipe down the RV’s exterior with acetone and a microfiber cloth to remove any oily residue that might prevent good adhesion.
Dust from sanding will ruin the paint texture. Wipe the area down again with a damp microfiber cloth to ensure there is no dust.
Step
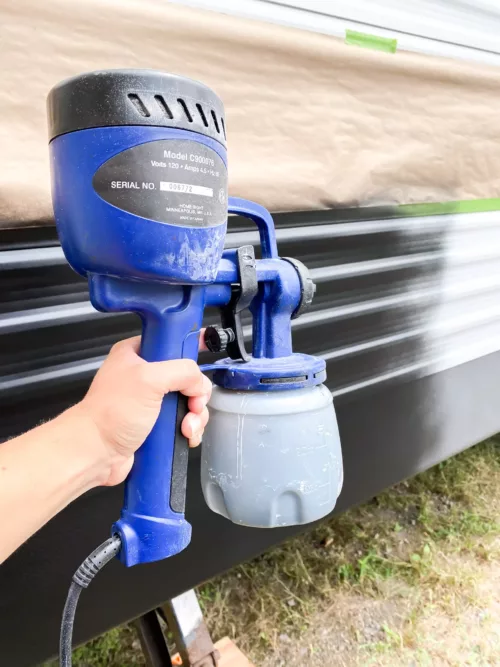
Prime
Using a paint sprayer, apply one coat of primer. The primer is an important step to allow for proper adhesion of the paint. Priming the exterior also helps unify the surface and allows for good paint coverage.
Remember: Never paint in direct sunlight or on windy days. Be careful not to stir up dust.
… peeling most often occurs when walls aren’t properly sanded or cleaned before being primed and painted.
Madison from Troop Nashville told Insider
Step
Paint the 1st coat
Using a paint sprayer, apply one coat of paint.
A paint sprayer requires some finesse and technique. Here are some helpful tips for using a paint sprayer:
- Try to keep a wet edge
- Move in smooth, horizontal movements
- Keep your sprayer vertical
- Spray about 10-12 inches from your RV’s exterior
Step
Scuff
After allowing the paint to dry, lightly scuff the painted surface with a scuff pad.
Then wipe down the entire surface again with a clean damp cloth to remove any dust particles.
Step
Apply the 2nd coat of paint
Apply another coat of paint to your RV’s exterior.
If the paint looks uneven after drying, scuff the surface once again and apply another coat of paint.
Depending on the condition that your RV’s exterior was in and how well you did in your preparation, you may need 2-3 coats of paint for a solid, smooth finish.
Step
Clearcoat
After the 2nd (or 3rd) coat of paint is dry, apply a clear topcoat. Using the paint sprayer, apply one coat of clear coat.
The clear coat will give your paint that finished look and protect the paint from chipping and fading.
Step
Clean up!
Now it’s time to enjoy that beautiful exterior. Remove all painter’s tape and masking paper.
Once the paint has fully cured according to the Dupli-Color instructions (or whatever RV exterior paint you chose), buff the surface to enhance the paint’s look.
How to Protect Your RV’s Exterior from Damaging UV Light
Now that your RV’s exterior is cleaned up and freshly painted you’re going to want that finish to last. The sun’s harmful UV rays can make quick work damaging the finish on your motorhome or trailer. Over time, sun exposure can make your RV decals fade and can dull the finish.
Here are some simple ways to keep your RV’s exterior looking like new:
- Wax your RV regularly
- Park in the shade when possible
- Store your RV properly in the winter or invest in a high-quality RV cover
There you have it, 10 easy steps to paint an RV exterior!
Remember to properly prep the exterior surface so that the paint has something to adhere to. Go slow and do it right so you don’t have to do it again next season.